1. 파이어베이스 기본 설정
https://firebase.google.com/?hl=ko
Firebase | Google’s Mobile and Web App Development Platform
개발자가 사용자가 좋아할 만한 앱과 게임을 빌드하도록 지원하는 Google의 모바일 및 웹 앱 개발 플랫폼인 Firebase에 대해 알아보세요.
firebase.google.com
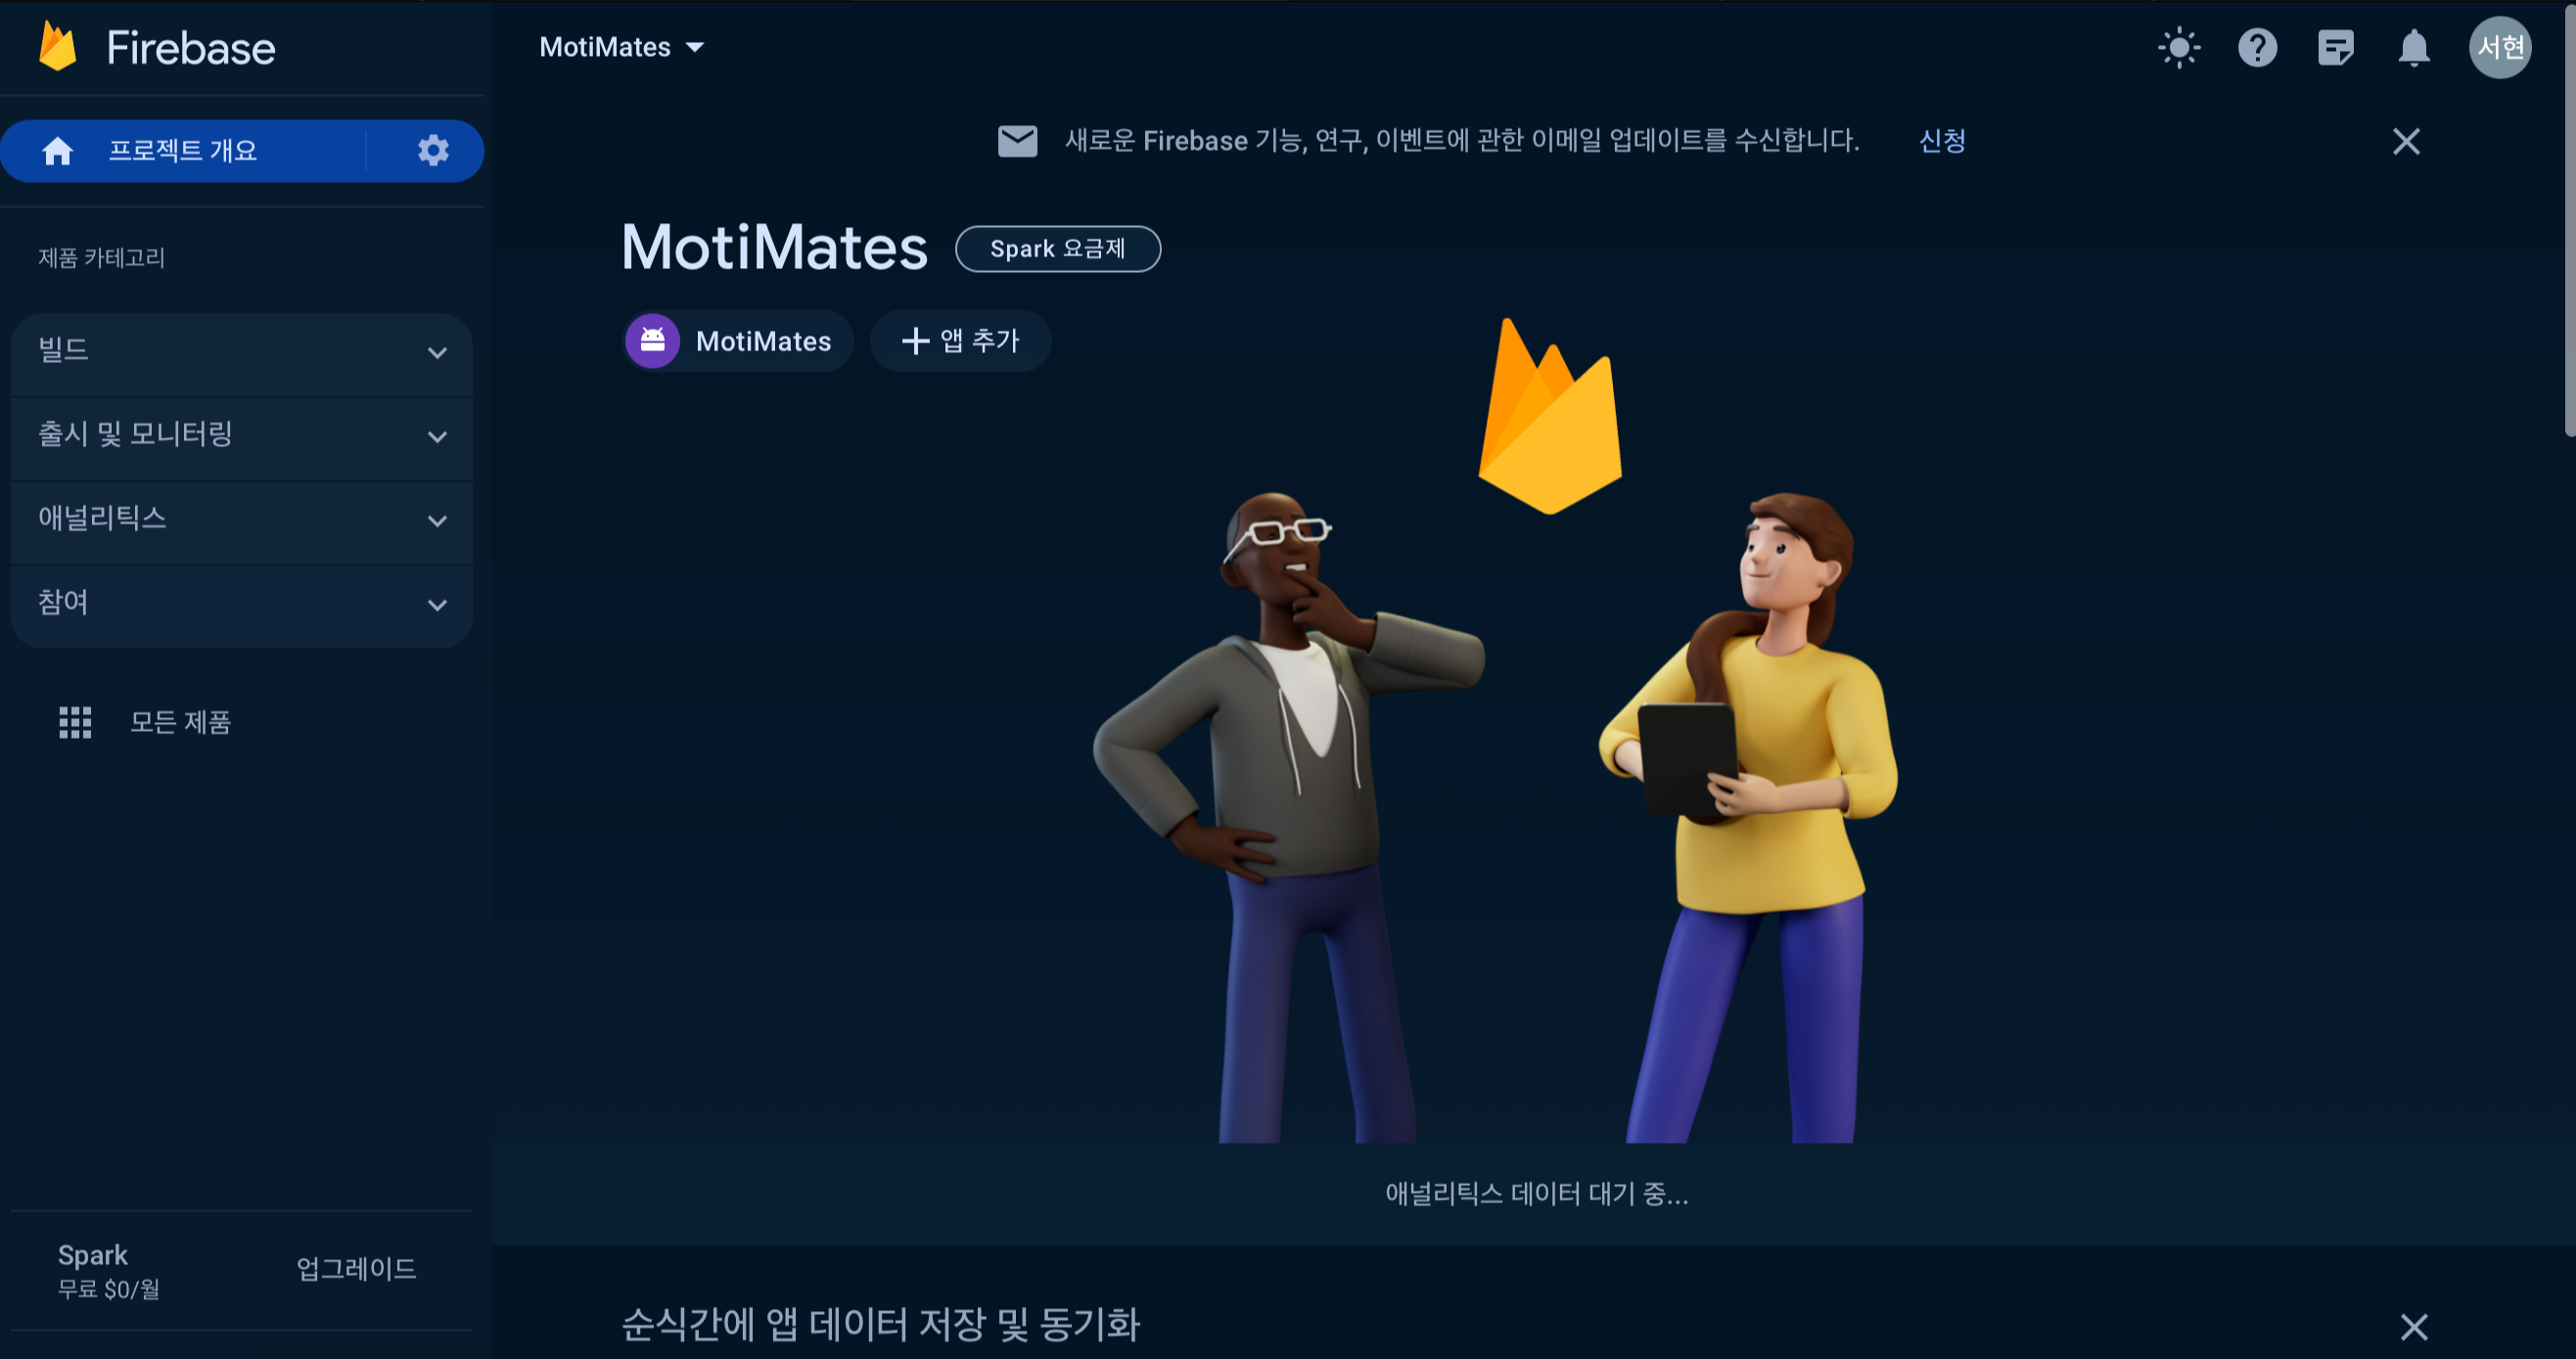
위 링크에 접속하셔서 진행하시면 됩니다.

해당 링크에 접속한 뒤 프로젝트 추가에 들어갑니다.
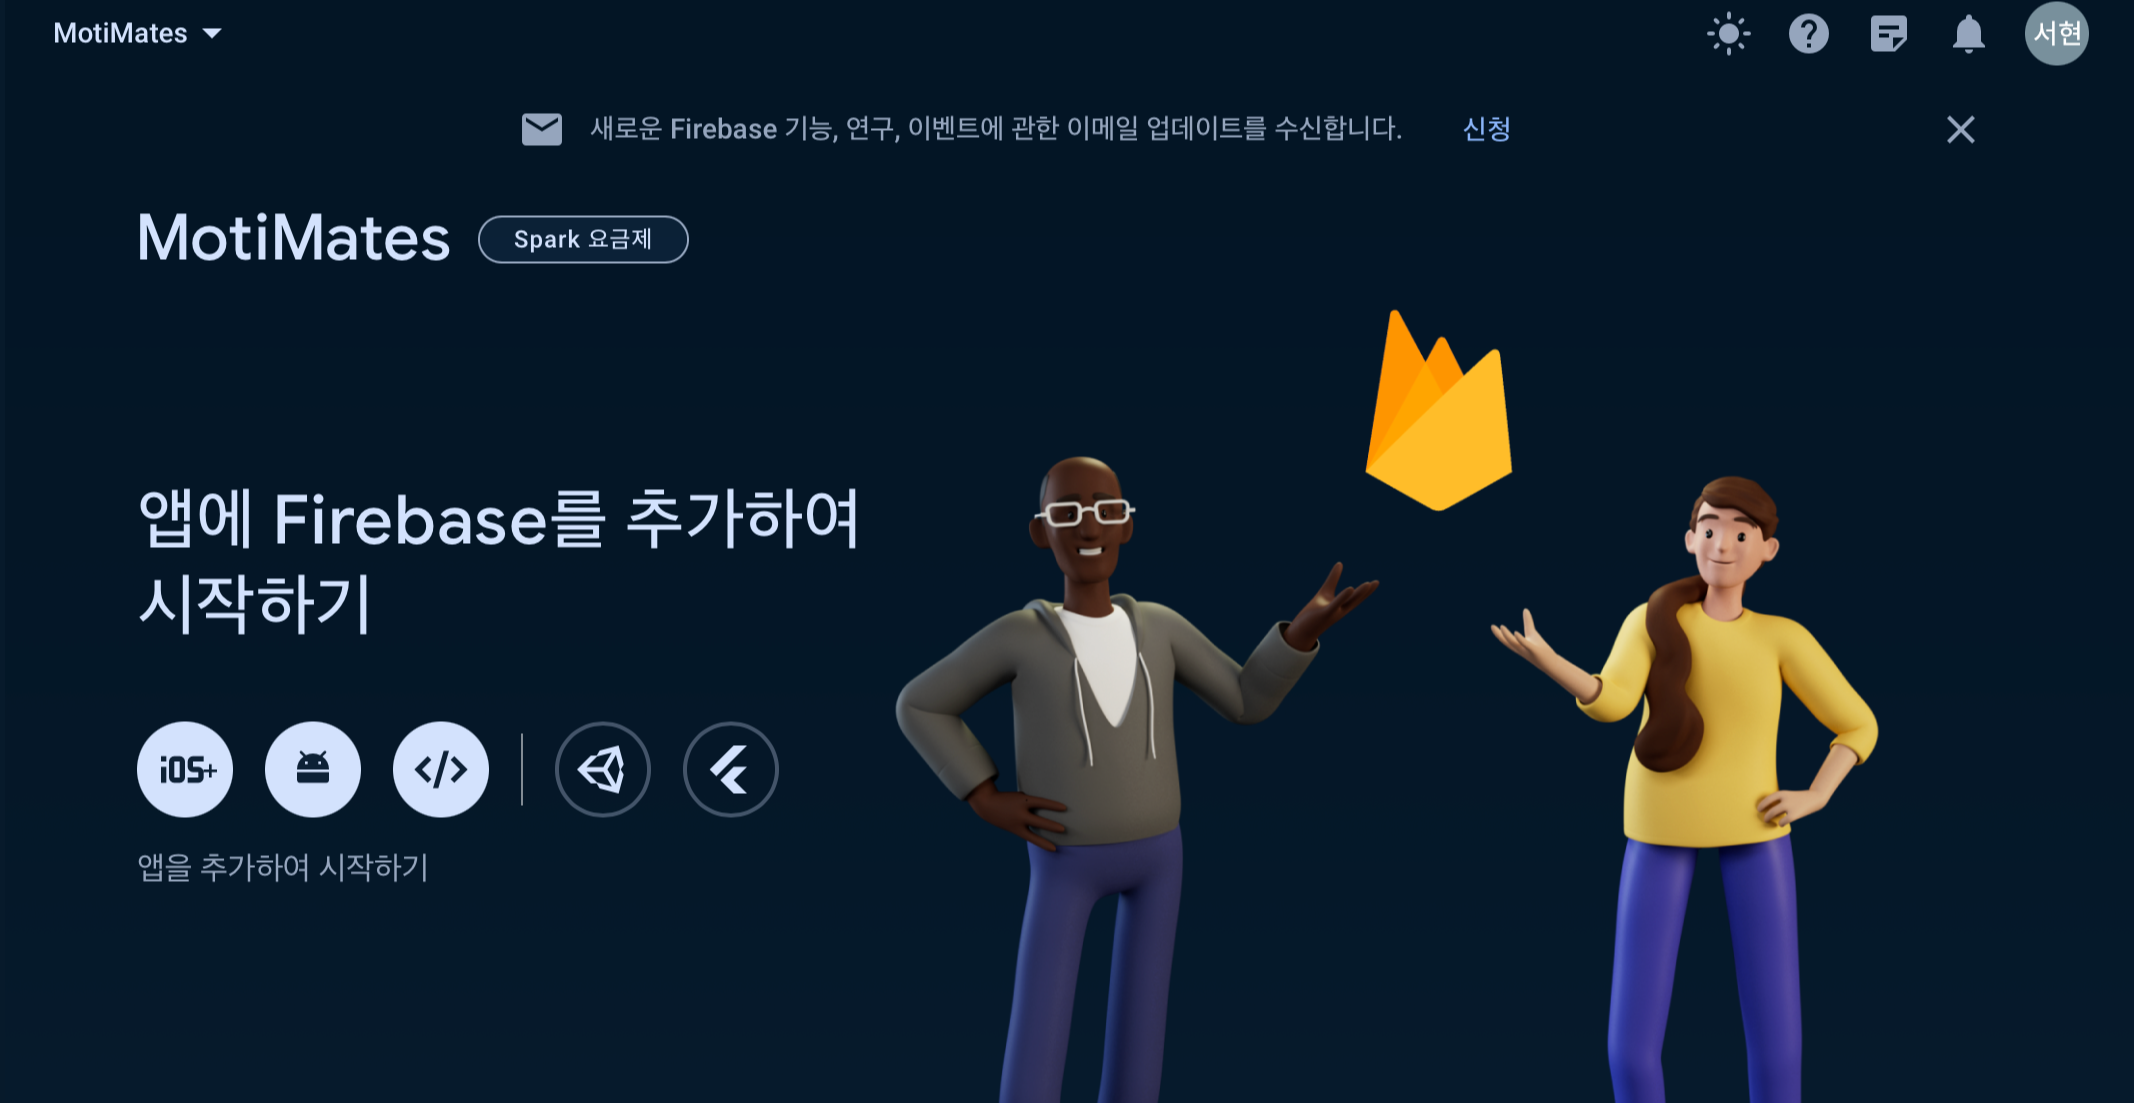
개발하시는 환경에 맞춰서 선택하시면 되는데, 저는 안드로이드 아이콘을 선택했습니다.

이런 화면이 나올텐데, 패키지 이름과 닉네임을 작성하시고 SHA-1 작성해주시면 됩니다.
SHA-1 추출하는 법
https://2se0h2un-coding.tistory.com/54
[android/kotlin] 안드로이드 스튜디오 터미널에서 SHA-1 추출하기
./gradlew signingreport 터미널에 입력하신 후 SHA-1 추출하시면 됩니다.
2se0h2un-coding.tistory.com
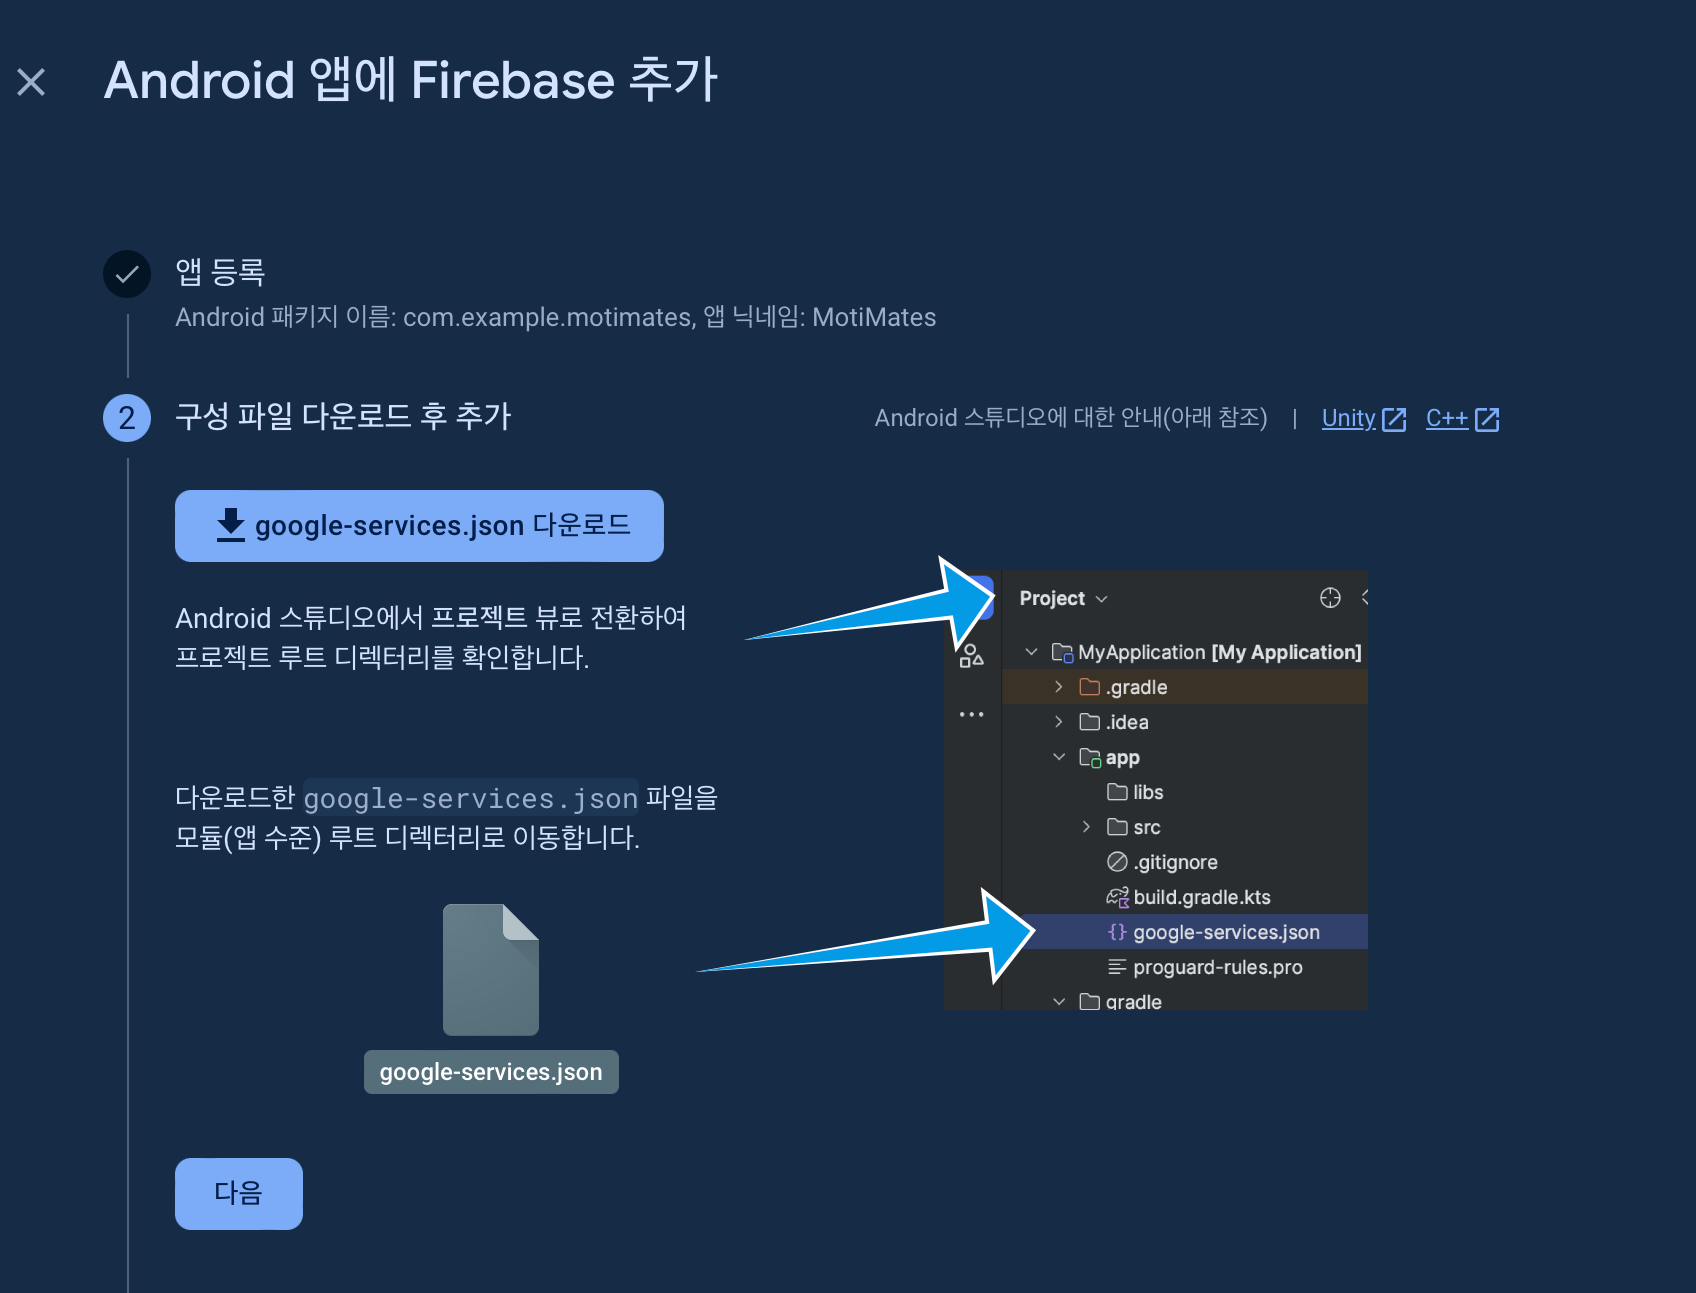
그 다음 google-services.json 다운로드 버튼을 누르고 json 파일을 다운받습니다.
다운 받은 파일을 app 디렉터리에 추가해줍니다.
저 사진에서 보면 json 파일이 가시적으로 나오던데, 저는 프로젝트 뷰에서는 따로 json 파일이 뜨지 않았습니다.

파인더에서 확인해보니 제대로 들어간 것을 확인할 수 있었습니다.
- 의존성 추가하기
id("com.google.gms.google-services") version "4.4.0" apply false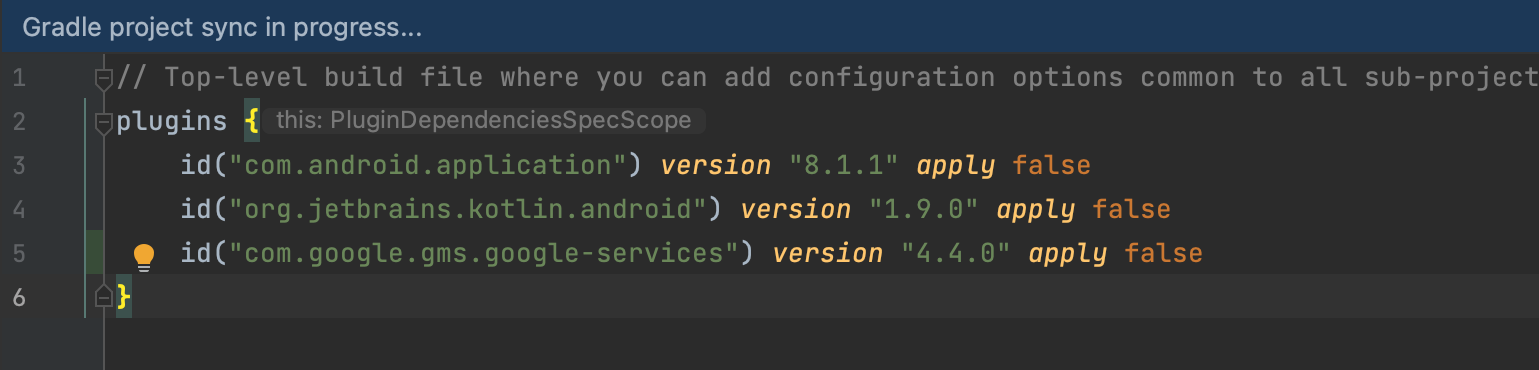
👆이건 프로젝트 build.gradle에 추가
plugins {
    id("com.android.application")
    id("org.jetbrains.kotlin.android")
    id("com.google.gms.google-services") // 추가한 코드
}
// Import the Firebase BoM
implementation(platform("com.google.firebase:firebase-bom:32.6.0"))
// TODO: Add the dependencies for Firebase products you want to use
// When using the BoM, don't specify versions in Firebase dependencies
implementation("com.google.firebase:firebase-analytics")
// Add the dependencies for any other desired Firebase products
// https://firebase.google.com/docs/android/setup#available-libraries
// 로그인 관련 Implementation
implementation("com.google.firebase:firebase-auth-ktx")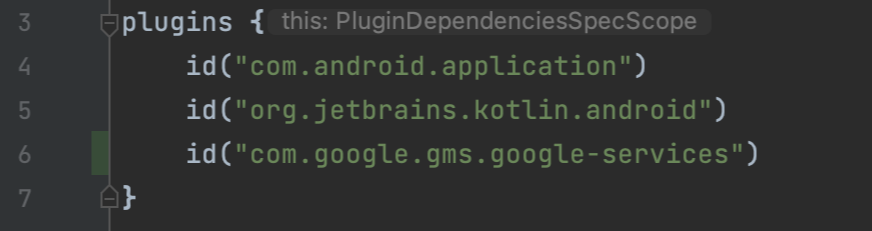

이 코드는 앱 build.gradle 파일에 추가하시고 Sync now 해주시면 됩니다.
- AndroidManifest 파일 수정
<uses-permission android:name="android.permission.INTERNET" />
매니페스트 파일에 인터넷 권한도 추가합니다.
아마 추가해야 할 코드 목록이 바로 뜰 거라서, 그냥 파일 찾아서 복사 붙여넣기만 하시면 됩니다.
추가하시면 이런 화면이 뜰텐데, 밑으로 스크롤 하셔서

Authentication을 선택해줍니다.

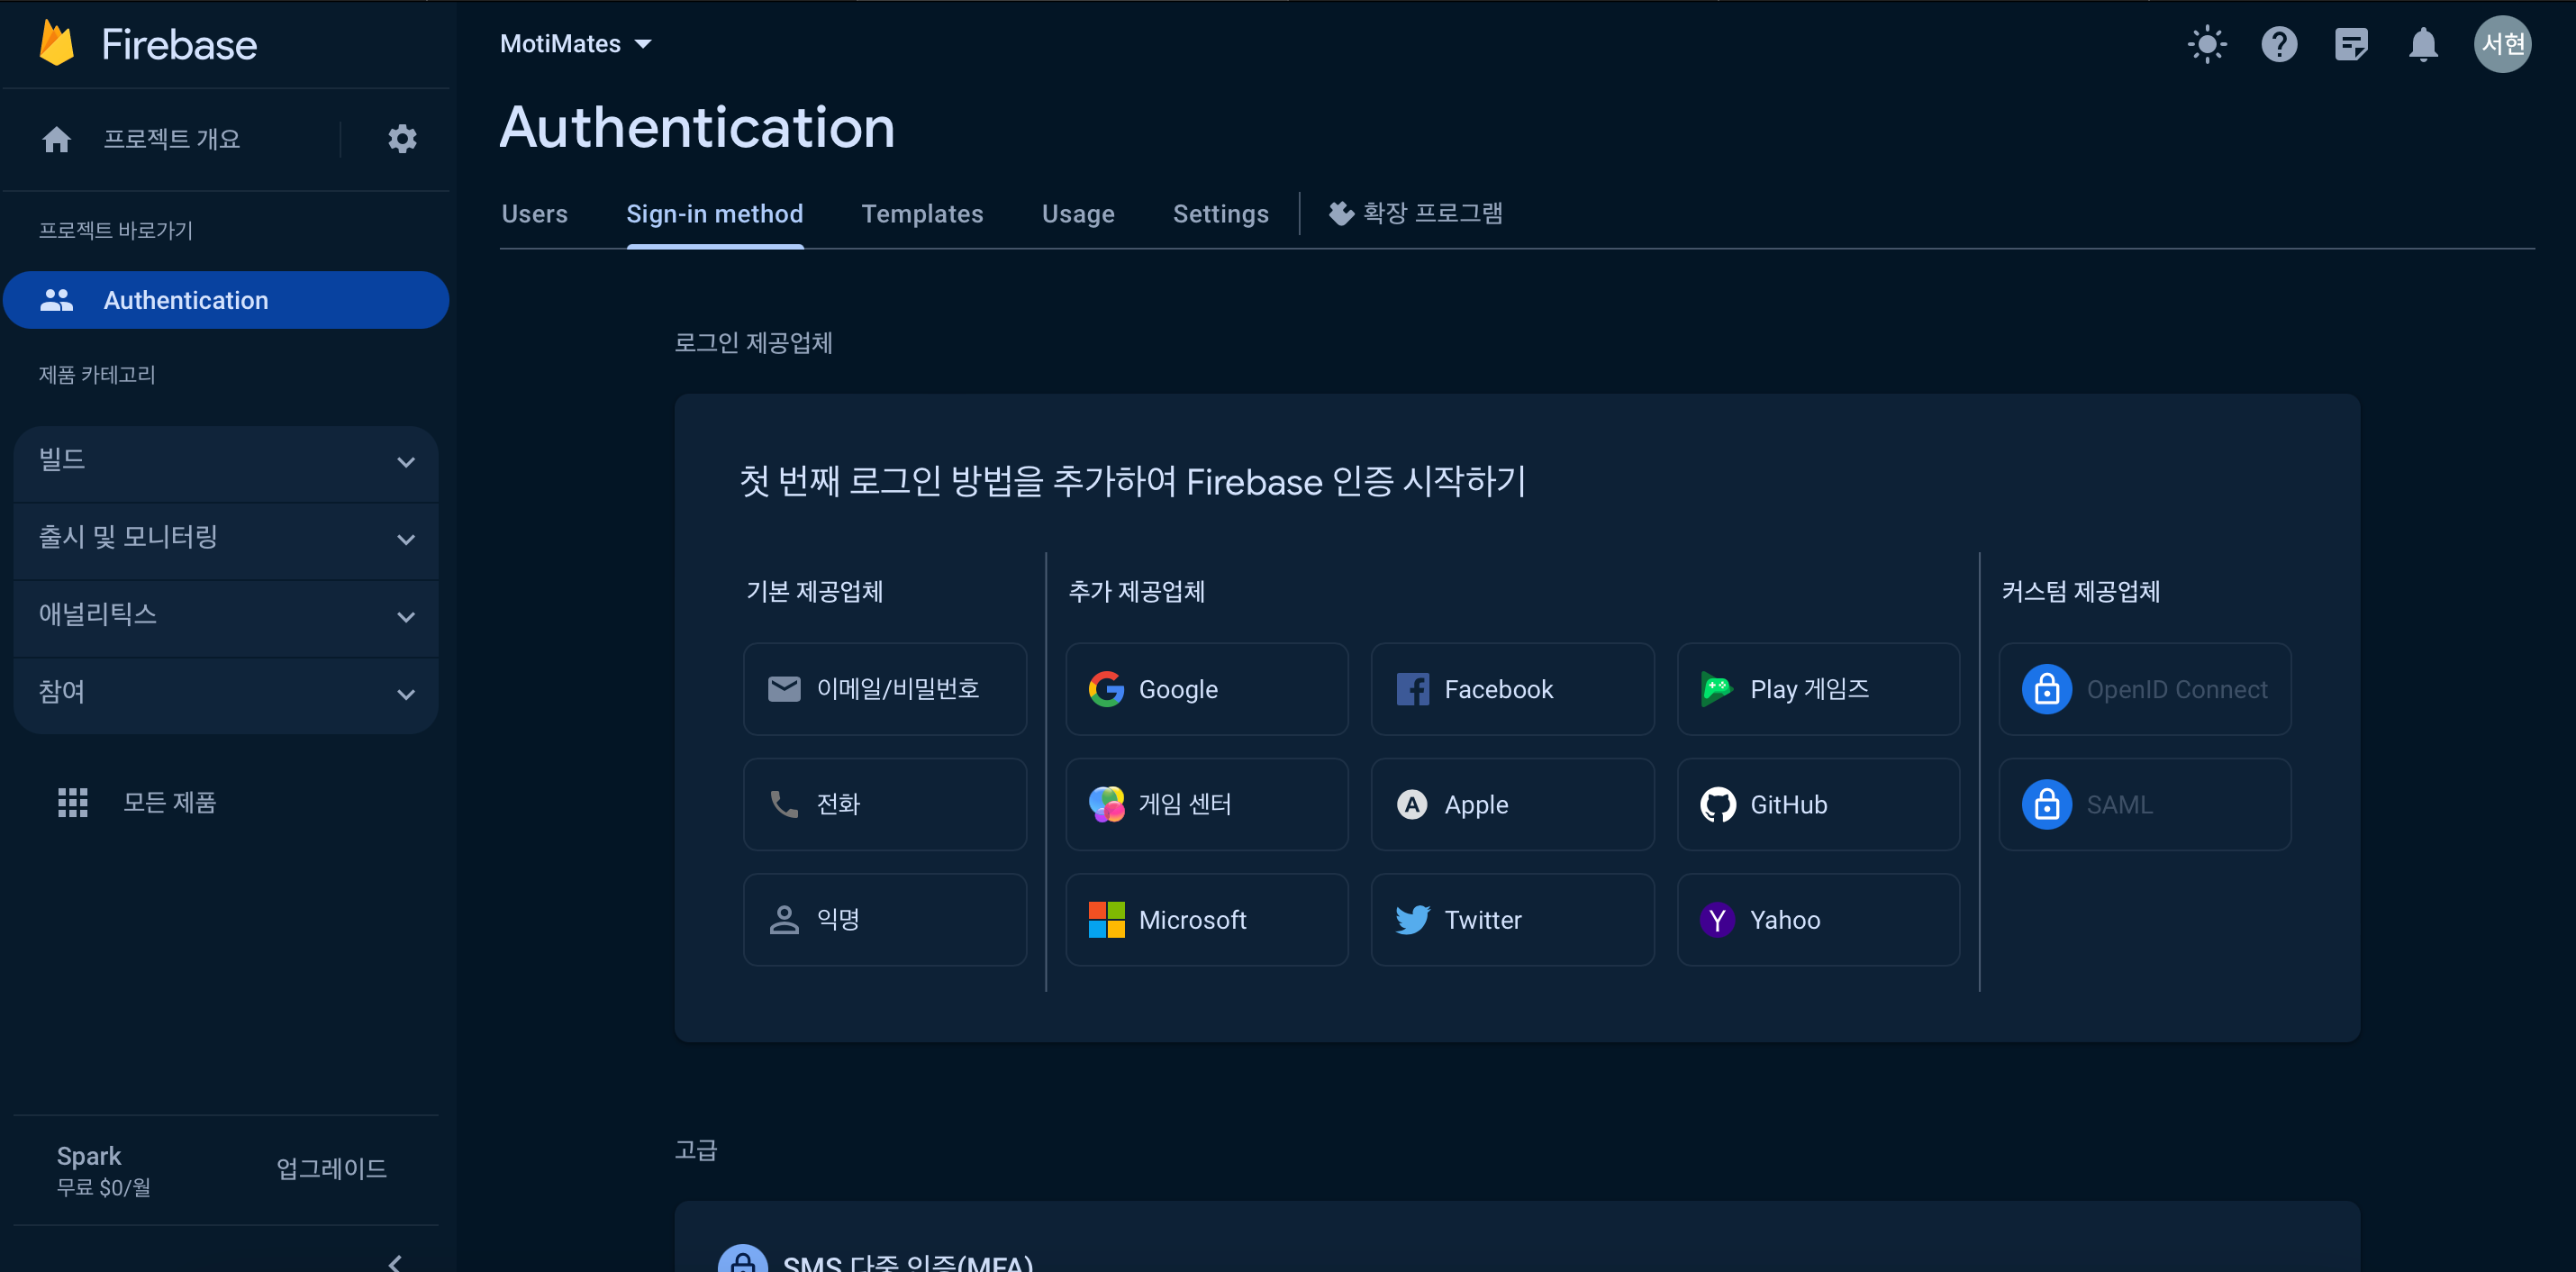
시작하기를 누르면 로그인 방법을 선택할 수 있습니다.
저는 따로 구글 로그인이 필요한 게 아니라, 이메일/전화번호를 선택했습니다.

이메일/비밀번호 사용 설정 켜주시면 파이어베이스 설정은 끝입니다.

실제로 앱에서 회원가입을 진행했을 때 유저가 제대로 저장되는 것을 볼 수 있습니다.
2. 안드로이드 스튜디오에서 회원가입 구현
회원가입을 구현하기 위해, empty view activity를 사용하여 Signup 액티비티를 만들어줍니다.
activity_signup.xml
<?xml version="1.0" encoding="utf-8"?>
<!-- res/layout/activity_signup.xml -->

<RelativeLayout xmlns:android="http://schemas.android.com/apk/res/android"
    xmlns:tools="http://schemas.android.com/tools"
    android:layout_width="match_parent"
    android:layout_height="match_parent"
    android:paddingLeft="16dp"
    android:paddingTop="16dp"
    android:paddingRight="16dp"
    android:paddingBottom="16dp"
    tools:context=".Signup">

    <!-- 로고 이미지 -->
    <ImageView
        android:id="@+id/logoImageView"
        android:layout_width="100dp"
        android:layout_height="100dp"
        android:src="@drawable/logo"
        android:layout_centerHorizontal="true"
        android:layout_marginTop="30dp"/>

    <!-- MOTIMATES 텍스트 -->
    <TextView
        android:id="@+id/motimatesTextView"
        android:layout_width="wrap_content"
        android:layout_height="wrap_content"
        android:layout_below="@id/logoImageView"
        android:layout_centerHorizontal="true"
        android:text="MOTIMATES"
        android:textStyle="bold"
        android:textSize="30dp"
        android:textColor="@color/MainColor"
        android:layout_marginTop="8dp"/>

    <EditText
        android:id="@+id/signupEmail"
        android:layout_width="match_parent"
        android:layout_height="wrap_content"
        android:layout_below="@id/motimatesTextView"
        android:layout_marginTop="25dp"
        android:hint="    이메일 입력하기"
        android:inputType="textEmailAddress"
        android:background="@drawable/rounded_edittext"/>

    <EditText
        android:id="@+id/signupPassword"
        android:layout_width="match_parent"
        android:layout_height="wrap_content"
        android:layout_below="@id/signupEmail"
        android:layout_marginTop="25dp"
        android:hint="    비밀번호 입력하기"
        android:inputType="textPassword"
        android:background="@drawable/rounded_edittext"/>

    <EditText
        android:id="@+id/signupNickname"
        android:layout_width="match_parent"
        android:layout_height="wrap_content"
        android:layout_below="@id/signupPassword"
        android:layout_marginTop="25dp"
        android:hint="    닉네임 입력하기"
        android:inputType="textPersonName"
        android:background="@drawable/rounded_edittext"/>

    <EditText
        android:id="@+id/signupPhone"
        android:layout_width="match_parent"
        android:layout_height="wrap_content"
        android:layout_below="@id/signupNickname"
        android:layout_marginTop="25dp"
        android:hint="    전화번호 입력하기"
        android:inputType="textPhonetic"
        android:background="@drawable/rounded_edittext"/>

    <Button
        android:id="@+id/buttonSignUp"
        android:layout_width="match_parent"
        android:layout_height="wrap_content"
        android:layout_below="@id/signupPhone"
        android:layout_marginTop="25dp"
        android:text="가입하기"
        android:textStyle="bold"
        android:background="@drawable/rounded_rectangle4"/>

    <Button
        android:id="@+id/buttonCancel"
        android:layout_width="match_parent"
        android:layout_height="wrap_content"
        android:layout_below="@id/buttonSignUp"
        android:layout_marginTop="10dp"
        android:text="취소"
        android:background="@drawable/rounded_rectangle5"/>
</RelativeLayout>
저는 이메일, 비밀번호, 닉네임, 전화번호를 받을 거라서 EditText를 이용했습니다.
Signup.kt
private var auth : FirebaseAuth? = nullauth를 전역변수로 선언해줍니다.
auth = Firebase.authonCreate 안에 선언해주시면 됩니다.
//onCreate

override fun onCreate(savedInstanceState: Bundle?) {
        super.onCreate(savedInstanceState)
        auth = Firebase.auth
        setContentView(R.layout.activity_signup)

        // 가입하기 버튼
        val buttonSignup: Button = findViewById(R.id.buttonSignUp)
        buttonSignup.setOnClickListener {
            val emailEditText: EditText = findViewById(R.id.signupEmail)
            val passwordEditText: EditText = findViewById(R.id.signupPassword)
            val nicknameEditText : EditText = findViewById(R.id.signupNickname)
            val email = emailEditText.text.toString()
            val password = passwordEditText.text.toString()
            val nickname = nicknameEditText.text.toString()
            createAccount(email, password, nickname)
        }

        // 취소하기 버튼
        val cancelButton: Button = findViewById(R.id.buttonCancel)
        cancelButton.setOnClickListener {
            finish() // 액티비티 종료
        }
    }
후에 닉네임을 수정할 수 있게 할 거라서, nickname까지 받아왔습니다.
사실 전화번호는 그냥 구색 맞추기용으로 넣어둬서, 따로 전화번호를 계정 정보에는 포함하지 않았습니다.
//createAccount

private fun createAccount(email: String, password: String, nickname: String) {
        if (email.isNotEmpty() && password.isNotEmpty()) {
            auth?.createUserWithEmailAndPassword(email, password)
                ?.addOnCompleteListener(this) { task ->
                    if (task.isSuccessful) {
                        saveNickname(nickname)
                        Toast.makeText(
                            this, "계정 생성 완료.",
                            Toast.LENGTH_SHORT
                        ).show()
                        finish() // 가입창 종료
                    } else {
                        Toast.makeText(
                            this, "계정 생성 실패: ${task.exception?.message}",
                            Toast.LENGTH_SHORT
                        ).show()
                    }
                }
        }
    }
이메일, 비밀번호, 닉네임을 받아와 파이어베이스에 저장하는 코드입니다.
종종 필드를 다 채웠음에도 회원 가입에 실패하는 경우가 있는데, 비밀번호가 6자 이상인지 확인해보시기를 바랍니다.
3. 안드로이드 스튜디오에서 로그인 구현
회원가입과 동일하게 empty view로 Signin이라는 이름의 액티비티를 생성해줍니다.
Signin.kt
회원가입때와 동일하게 변수 선언 진행하시면 됩니다.
private var auth : FirebaseAuth? = nullauth를 전역변수로 선언해줍니다.
auth = Firebase.authonCreate 안에 선언해주시면 됩니다.
activity_signin.xml
<?xml version="1.0" encoding="utf-8"?>
<!-- res/layout/activity_signin.xml -->

<RelativeLayout xmlns:android="http://schemas.android.com/apk/res/android"
    xmlns:tools="http://schemas.android.com/tools"
    android:layout_width="match_parent"
    android:layout_height="match_parent"
    android:paddingLeft="16dp"
    android:paddingTop="16dp"
    android:paddingRight="16dp"
    android:paddingBottom="16dp"
    tools:context=".Signin">

    <!-- 로고 이미지 -->
    <ImageView
        android:id="@+id/logoImageView"
        android:layout_width="100dp"
        android:layout_height="100dp"
        android:src="@drawable/logo"
        android:layout_centerHorizontal="true"
        android:layout_marginTop="30dp"/>

    <!-- MOTIMATES 텍스트 -->
    <TextView
        android:id="@+id/motimatesTextView"
        android:layout_width="wrap_content"
        android:layout_height="wrap_content"
        android:layout_below="@id/logoImageView"
        android:layout_centerHorizontal="true"
        android:text="MOTIMATES"
        android:textStyle="bold"
        android:textSize="30dp"
        android:textColor="@color/MainColor"
        android:layout_marginTop="8dp"/>

    <EditText
        android:id="@+id/idEditText"
        android:layout_width="match_parent"
        android:layout_height="wrap_content"
        android:layout_below="@id/motimatesTextView"
        android:layout_marginTop="20dp"
        android:hint="    이메일"
        android:background="@drawable/rounded_rectangle3"/>

    <EditText
        android:id="@+id/passwordEditText"
        android:layout_width="match_parent"
        android:layout_height="wrap_content"
        android:layout_below="@id/idEditText"
        android:layout_marginTop="10dp"
        android:inputType="textPassword"
        android:hint="    비밀번호"
        android:background="@drawable/rounded_rectangle3"/>

    <Button
        android:id="@+id/loginButton"
        android:layout_width="match_parent"
        android:layout_height="wrap_content"
        android:layout_below="@id/passwordEditText"
        android:layout_marginTop="16dp"
        android:text="로그인"
        android:background="@drawable/rounded_rectangle4"/>

    <Button
        android:id="@+id/signupButton"
        android:layout_width="match_parent"
        android:layout_height="wrap_content"
        android:layout_below="@id/loginButton"
        android:layout_marginTop="16dp"
        android:text="회원가입"
        android:background="@drawable/rounded_rectangle6"/>
</RelativeLayout>
이메일, 비밀번호를 입력하여 로그인할 수 있도록 작성했습니다.
스플래시 화면 후 바로 로그인 화면으로 넘어가게 할 거라서, 로그인과 회원가입 버튼 두 개를 배치했습니다.
Signin.kt
class Signin : AppCompatActivity() {
    private var auth : FirebaseAuth? = null

    override fun onCreate(savedInstanceState: Bundle?) {
        super.onCreate(savedInstanceState)
        setContentView(R.layout.activity_signin)
        auth = Firebase.auth

        val signupButton : Button = findViewById(R.id.signupButton)
        val loginButton : Button = findViewById(R.id.loginButton)

        // 회원가입 창으로
        signupButton.setOnClickListener {
            startActivity(Intent(this,Signup::class.java))
        }

        // 로그인 버튼
        loginButton.setOnClickListener {
            val idEditText : EditText = findViewById(R.id.idEditText)
            val passwordEditText : EditText = findViewById(R.id.passwordEditText)
            signIn(idEditText.text.toString(),passwordEditText.text.toString())
        }
    }

    // 로그아웃하지 않을 시 자동 로그인 , 회원가입시 바로 로그인 됨
    public override fun onStart() {
        super.onStart()
        moveMainPage(auth?.currentUser)
    }

    // 로그인
    private fun signIn(email: String, password: String) {

        if (email.isNotEmpty() && password.isNotEmpty()) {
            auth?.signInWithEmailAndPassword(email, password)
                ?.addOnCompleteListener(this) { task ->
                    if (task.isSuccessful) {
                        Toast.makeText(
                            baseContext, "로그인에 성공 하였습니다.",
                            Toast.LENGTH_SHORT
                        ).show()
                        moveMainPage(auth?.currentUser)
                    } else {
                        Toast.makeText(
                            baseContext, "로그인에 실패 하였습니다.",
                            Toast.LENGTH_SHORT
                        ).show()
                    }
                }
        }
    }

    // 유저정보 넘겨주고 메인 액티비티 호출
    fun moveMainPage(user: FirebaseUser?){
        if( user!= null){
            startActivity(Intent(this,MainActivity::class.java))
            finish()
        }
    }
이렇게 작성하였습니다.
회원 가입 후 바로 로그인 화면으로 넘어오게 됩니다.
3. 안드로이드 스튜디오에서 로그아웃 구현
activity_logout.xml
<?xml version="1.0" encoding="utf-8"?>
<!-- activity_logout.xml -->

<RelativeLayout xmlns:android="http://schemas.android.com/apk/res/android"
    android:layout_width="match_parent"
    android:layout_height="match_parent"
    android:padding="16dp">

    <!-- 로고 이미지 -->
    <ImageView
        android:id="@+id/logoImageView"
        android:layout_width="100dp"
        android:layout_height="100dp"
        android:src="@drawable/logo"
        android:layout_centerHorizontal="true"
        android:layout_marginTop="180dp"/>

    <!-- MOTIMATES 텍스트 -->
    <TextView
        android:id="@+id/motimatesTextView"
        android:layout_width="wrap_content"
        android:layout_height="wrap_content"
        android:layout_below="@id/logoImageView"
        android:layout_centerHorizontal="true"
        android:text="MOTIMATES"
        android:textStyle="bold"
        android:textSize="30dp"
        android:textColor="@color/MainColor"
        android:layout_marginTop="8dp"/>

    <!-- "정말 로그아웃 하시겠습니까?" 텍스트 -->
    <TextView
        android:id="@+id/logoutConfirmationText"
        android:layout_width="wrap_content"
        android:layout_height="wrap_content"
        android:layout_below="@id/motimatesTextView"
        android:layout_centerHorizontal="true"
        android:text="정말 로그아웃 하시겠습니까?"
        android:textSize="20dp"
        android:textStyle="bold"
        android:layout_marginBottom="16dp"
        android:layout_marginTop="20dp"/>

    <LinearLayout
        android:id="@+id/buttonLayout"
        android:layout_width="250dp"
        android:layout_height="wrap_content"
        android:orientation="horizontal"
        android:layout_below="@id/logoutConfirmationText"
        android:layout_centerHorizontal="true"
        android:layout_marginTop="15dp">

        <!-- 확인 버튼 -->
        <Button
            android:id="@+id/logoutButton"
            android:layout_width="0dp"
            android:layout_height="40dp"
            android:layout_weight="1"
            android:text="확인"
            android:background="@drawable/rounded_rectangle4"/>

        <!-- 취소 버튼 -->
        <Button
            android:id="@+id/logoutCancelButton"
            android:layout_width="0dp"
            android:layout_height="40dp"
            android:layout_weight="1"
            android:layout_marginStart="8dp"
            android:text="취소"
            android:textStyle="bold"
            android:background="@drawable/rounded_rectangle5"/>
    </LinearLayout>
</RelativeLayout>
별 다른 구성요소 없이, 정말 로그아웃 하겠냐는 확인 문구와 확인 및 취소 버튼을 배치했습니다.
Logout.kt
class Logout : AppCompatActivity() {
    private var auth: FirebaseAuth? = null

    override fun onCreate(savedInstanceState: Bundle?) {
        super.onCreate(savedInstanceState)
        setContentView(R.layout.activity_logout)

        val logoutButton: Button = findViewById(R.id.logoutButton)
        val cancelButton: Button = findViewById(R.id.logoutCancelButton)

        logoutButton.setOnClickListener {
            // 로그아웃 수행
            FirebaseAuth.getInstance().signOut()

            // 토스트 메시지 표시
            Toast.makeText(
                this@Logout,
                "로그아웃 되었습니다.",
                Toast.LENGTH_SHORT
            ).show()

            // 로그인 페이지로 이동
            val intent = Intent(this@Logout, Signin::class.java)
            intent.addFlags(Intent.FLAG_ACTIVITY_CLEAR_TOP or Intent.FLAG_ACTIVITY_NEW_TASK)
            startActivity(intent)

            // 현재 액티비티 종료
            finish()
        }

        cancelButton.setOnClickListener {
            // 메인 페이지로 이동
            val intent = Intent(this@Logout, MainActivity::class.java)
            startActivity(intent)

            // 현재 액티비티 종료
            finish()
        }
    }
}
로그아웃 하고난 뒤 바로 로그인 페이지로 연결함.
로그아웃이 정말로 수행되는 코드 자체는
// 로그아웃 수행
FirebaseAuth.getInstance().signOut()
이 부분입니다.
각자 개발하시는 어플에 따라서 토스트 메시지를 띄울 지, 화면이 어떻게 넘어갈 지 적절하게 수정하시면 됩니다.
'dev > android' 카테고리의 다른 글
| [android/kotlin] 안드로이드 스튜디오 터미널에서 SHA-1 추출하기 (1) | 2023.12.07 |
|---|
